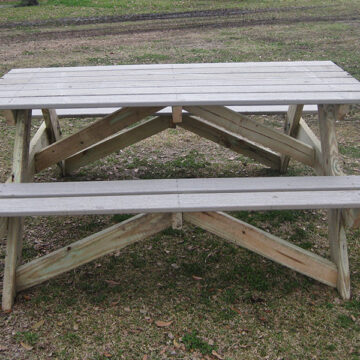
Adults and children appreciate having plenty of seating areas in and near their playspace. Picnic tables provide seating, which encourages supervision when placed near a playground. Also, picnic tables provide opportunities for groups of people (families, friends, community members) to socialize and enjoy one another’s company.
Sort all materials into piles by like item to ensure you have materials needed to complete project.
Take [1] of the 2x6x12' boards. Cut into [2] 65 ¾" pieces.
Take the remaining [5] 2x6x12' boards. Cut each into [2] 72" pieces, for a total of [10] 2x6x72" pieces.
Take the [2] 2x6x8' boards. Cut each into [2] 39 ¼" pieces, for a total of [4] 2x6x39 ¼" pieces.
Take [1] of the 2x4x10' boards. Cut into [3] 34 ¼" pieces.
Take the remaining 2x4x10' board. Cut into [2] 32" pieces.
Angled Cuts:
Inventory and sort all of your materials.
Assemble the A-frame sides as shown. Line up the bottom corners of the 2x4x34¼" table top supports with the outside of the 2x6x39¼" legs. Make sure legs are flush with the top support. Attach with two deck screws to hold in place.
Next, line up the 2x6x65¾" so they are level with the ground, and the top edge extends 12⅛" from the legs on either side. Secure with two deck screws to hold in place.
Attach each intersection with carriage bolts: Drill ⅜" holes and use the carriage bolts to secure the connection: keep the bolt heads against the seat and top supports (facing outward) and the washers and nuts against the legs (facing inward on a completed table). Make sure the bolts are staggered as shown.
Attach seats: Begin by first standing up the two A-frame sides, making sure the seat supports and top supports are facing outwards and the legs are towards the inside. Then attach one (1) 2x6x72" seat on each side of the A-frames, flush with the end of the seat support. Overhang the end of the 2x6 seats 6" past the outside face of the seat support. Attach with two screws.
Next, secure the second 2x6x72" seats. Be sure to leave a ¼" gape between them. (Hint: Use a pencil to ensure a ¼" gap when attaching the seats with deck screws).
Attach tabletop boards and center support:
Then install the diagonal 2x4x32" braces flush with the center tabletop support and the seat supports (stagger slightly as shown in "Top View"). Attach with two screws at either end.
Attach remaining tabletop boards: Install the remaining 2x6x72" table top boards with two screws on either end, ensuring that they extend beyond the A-frames by 6" and have a ¼" gap between them.
KABOOM! is a national nonprofit that works to achieve playspace equity. Kids who don't have access to play miss out on childhood and are denied critical opportunities to build physical, social and emotional health.
We team up with communities to build incredible playspaces that help give every kid the opportunity to thrive.
Our goal is to end playspace inequity. For good.
Sign up for our emails to learn more about our work and how you can help KABOOM! create sparks for change.
Sign up!
Recycling bins and trash containers help you maintain the playspace by providing places for community members to properly dispose of waste. Bins can be placed inside these containers, making for a much more attractive receptacle.
Murals provide color and an imaginative setting to a playspace. They also can be a reflection of the community based on the theme of the mural. Murals can also give communities a sense of historical context for their neighborhood and many murals are considered by the local government to be works of art, which gives the immediate neighbors more leverage when working to make other improvements.
Plant trees and shrubs, or add a pizza garden, butterfly garden, or custom garden to your playspace! The pizza garden is easy to create and provides a place where kids can watch different plants grow, seeing the similarities and differences in each. The butterfly garden encourages exploration, offers a sensory experience and can be the setting for many science lessons. The custom garden is specifically designed for the needs of the community.